Migration Notice: LegacyVPN is undergoing a migration to Cisco's ASA VPN. Please refer to https://isea.utoronto.ca/services/vpn/utorvpn/ for documentation on the new service.
Installing LegacyVPN
These instructions were written to configure the OpenVPN plugin to
NetworkManager in Ubuntu. They will probably work on any Linux platform
that has NetworkManager and the OpenVPN plugin, but other platforms have
not been tested. In Ubuntu, you can usually verify whether you are using
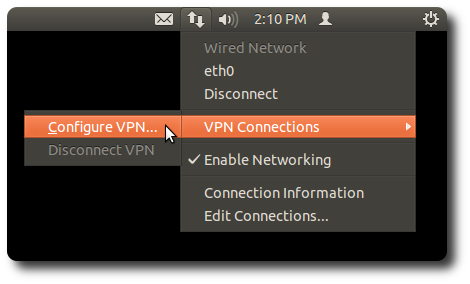
NetworkManager by looking for the presence of the following icon in the
menu bar, on the upper right of your screen:

-
Start by ensuring that you have the OpenVPN NetworkManager plugin
installed. You can do this by opening a terminal window, and typing:
# sudo apt-get install network-manager-openvpn-gnome -
Next, go to https://vpn.utoronto.ca/, and log in with
your UTORid and password. Follow the instructions there to create your LegacyVPN
certificates and configuration. Once created, download the certificate
package and using a terminal window, unpack the file. It will contain three
certificate files:
# tar -zvxf utorvpn.tgz x ca.crt x user.pem x key.pem -
Now click on the NetworkManager icon in the menu bar, and select "VPN
Connections" → "Configure VPN...".
-
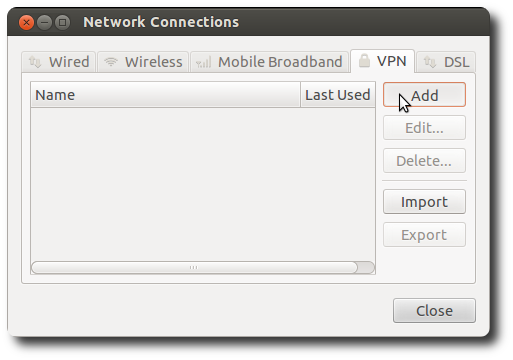
In the box that appears, click on the "VPN" tab, and choose "Add".
-
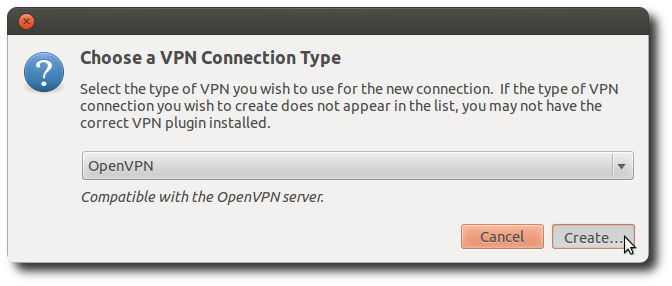
Make sure that "OpenVPN" is selected in the drop-down menu that appears and
click "Create...". If you do not see "OpenVPN" menu, ensure that the OpenVPN
NetworkManager plugin has been installed correctly as indicated in the
first step.
-
Now you will need to enter the configuration details. The screenshot below
should give you most of the default values. "Connection Name" should be
"LegacyVPN". Uncheck the "connect automatically" box. The Gateway is
vpn.utoronto.ca, and Authentication Type is "Password with Certificates (TLS)". Enter your actual UTORid in the "Username" field. I+TS recommends that you set the "Password" field to "Always Ask", so that your password is not stored in the system. The next step is to enter the three certificate files you unpacked in step 2 into the boxes. Once you have set all of these configuration options, click "Save...".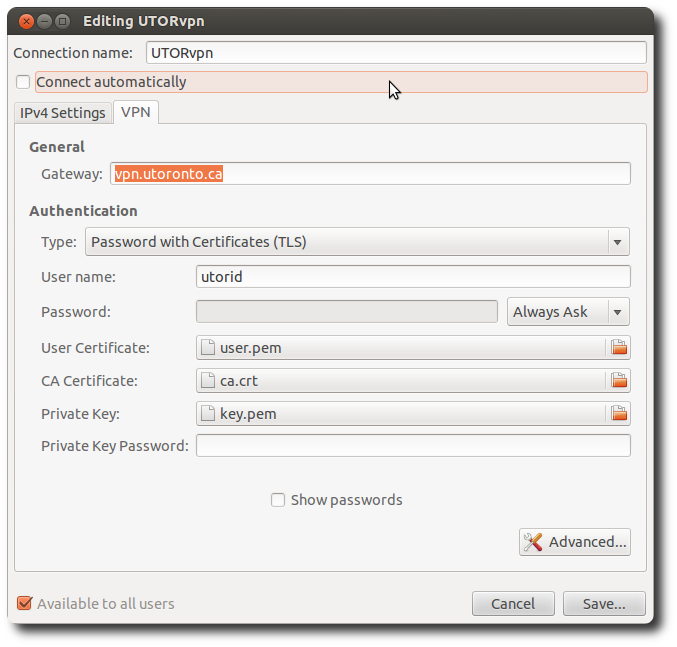
- That's it! Now that you have configured LegacyVPN, continue reading here to learn how to start up and use LegacyVPN.
last updated : v.